Shana Gaff
(260)897-3911
stressfreestamping@gmail.com
Independent Stampin' Up! Demonstrator

Saturday, September 7, 2013

Cutting back on my Internet Time

I got an email two days ago that I had already exceeded my internet usage for the month, which ends on the 22nd. Then today I got an email that I had already used 90% of my first overage amount. What?!  I do believe that Pinterest has been eating up all of my data!  I'm so sad because I love it and have had fun trying out some new things lately. But I will have to cut back so I don't have a huge internet bill. That's probably not a bad thing though because I haven't gotten much done around the house lately, so now I will have some free time to clean.  Ha ha!

I did a clean and simple card today for the challenges at Dynamic Duos and clean&simple.
I used bubble wrap last week and I knew it would come in handy again so I saved it just in case. I decided to use it for my background on this card.
I used my markers to color on the bubble wrap and then pressed it onto my cardstock. So easy and a great way to do a simple background!  I wanted to use stars instead of flowers but we don't have any star punches. BOO!  What I would really love is some star Framelits!  Are you listening SU!? :)

Stamp Set: Another Thank You
Cardstock: Old Olive, Pacific Point, Whisper White
Ink: Old Olive, Pacific Point
Tools: Itty Bitty Punch, Cupcake Punch, Chevron Embossing Folder

Wednesday, September 4, 2013

First fall, now winter?

Well it doesn't feel like fall OR winter today, but I decided to make a Christmas card for the challenge at Merry Monday.  I'm not usually interested in making cards out of season lol but I really liked the idea of this challenge. You have to leave a comment on 3 of the other participants' cards, which I don't do too much since I do that on the three design teams that I'm on, so I thought it would be fun to look at some of the other entries. The challenge this week is a classic Christmas challenge that I paired with the challenges at Freshly Made Sketches and Stampin' Royalty, which is to add patterned paper.

I didn't realize until today how FEW Christmas stamp sets I have left!  The last catalog retirement really wiped me out!  I decided to use a new one that has yet to see ink from Tag It.  This was one of our Convention sets and I think I've mentioned before that I didn't care for it too much. Well, I think that is because I was trying to look at it as a SET, when in actuality all of the images are really stand-alone images for different occasions. Now that I have realized that, I actually do kind of like the set! lol Good thing, right?  Cuz I have it, so I might as well use it!
I kind of made my own DSP strip out of the Season of Style DSP stack. I cut some diagonal strips, adhered them to a scrap piece of cardstock and then cut the edges off.  The focal image is popped up on Dimensionals and looks much better in person when you can see the layers. Isn't Santa a cutie?!  This is the first Santa stamp I have EVER owned!  I used my markers to give him green eyes, black boots and a black belt buckle. I just love him!  OH, and I finally got to use my Petals-a-Plenty Embossing Folder for the first time this year. That is just one of those things that I can't seem to ever use on a card that isn't for Christmas. It is just TOO Christmasy for me to figure out how to like it on any other project. haha

Stamp Set: Tag It
Cardstock: Crumb Cake, Cherry Cobbler, Whisper White
Ink: Basic Black, Crumb Cake, Cherry Cobbler, Old Olive
Tools: Petals-a-Plenty Embossing Folder, Ovals Collection Framelits, sponge
Accessories: Season of Style DSP pack, Dimensionals, Cherry Cobbler Baker's Twine

Tuesday, September 3, 2013

Goodbye Summer!

I know it was just last week that I was telling you how it FINALLY felt like summer around here.  It was in the 90s all week. Well that has certainly changed as it is in the lower 70s today! I don't know if it is supposed to stay this cool because my kids watch their morning cartoons during the news, but I am not liking it one bit!  The one thing I HAVE noticed though is that I have been in the mood to make fall cards. I can't get enough of the fall colors, THAT is for sure!  Today our challenge at Addicted to Stamps and More! is Anything Goes, so I was free to do whatever I wanted!  Yay! I decided to use the challenges from Mojo Monday and The Paper Players.
I wanted to use the scrumptious Sweater Weather DSP so I took my colors from that. 
I did some faux stitching around the outside of my DSP and the edge of my card. After I adhered the DSP I stamped it with some of the images from Gorgeous Grunge to give it some character. I haven't used Friendship Preserves in quite a while and thought it worked well with this sketch.  I did notice, however, that this is the only stamp that I have even punched out of the rubber to use. Oops!  Guess I will have to find something to do with the other stamps in the set!  I used my Blender Pen to color in the Thanks. The leaf was first stamped and then I covered it with my 2-Way Glue Pen and poured Orange and Gold Glitter over it to add some bling. 

Stamp Sets: Friendship Preserves, Gently Falling, Gorgeous Grunge
Cardstock: Crushed Curry, Tangerine Tango, Very Vanilla
Ink: Chocolate Chip, Crushed Curry, Early Espresso, Tangerine Tango
Tools: Woodgrain Embossing Folder, Window Frames Framelits
Accessories: Orange and Gold Glitter, Dimensionals, Sweater Weather DSP

Faux Silk

It's my favorite time of the month...time for a new challenge at Technique Time Tuesday!  The challenge this month is one that I have heard of but not tried before, Faux Silk.  It is SUPER easy and looks much better in person than with my crappy picture-taking skills. lol There is a great video with directions on the TTT website but I will walk you through what I did for my card
The first step is to stamp your images on tissue paper. I didn't think I had any white tissue paper, but then I remembered there is a sheet in between each page of window sheets!  So I was able to put that to use and recycle it. :) I stamped my leaves using the Rock-n-Roll Technique, where you ink it in the lighter color and then roll the edges of the stamp in the darker color. This is a two-step stamp set so I then stamped each leaf outline in Early Espresso. Next you need to carefully wad up your beautiful creation, being careful not to tear it when you unfold it.  This gives it wonderful texture!  The next step is to glue the tissue paper to Whisper White cardstock. I stamped mine first with some of the splotches from Gorgeous Grunge, hoping they would show through a little bit. And they did!  I used a glue stick to glue my tissue paper to the WW cardstock and then die cut it with the Window Frames Framelit.  I then inked the edges with Early Espresso ink to really make it pop off the card.  Here is a close-up shot where you can kind of see the texture on the print:
As I mentioned before, it looks much better in person!

Stamp Sets: Gently Falling, Gorgeous Grunge, Spread the Joy
Cardstock: Crumb Cake, Crushed Curry, Whisper White
Ink: Cajun Craze, Cherry Cobbler, Crushed Curry, Early Espresso
Tools: Window Frames Framelits, Paper-Piercing Tool
Accessories: Tissue Paper, Dimensionals

Saturday, August 31, 2013

I Hear Music, Mighty Fine Music

Ha ha, that's the first thing that came to mind when I saw our challenge for Addicted to CAS this week.
We sang that song for something when I was in show choir back in high school. Wow, that was a LONG time ago!  It is hard to believe I have been out of high school 16 years!  How can that be possible?! Anyway...I combined our music challenge with the challenges at Create with Connie and Mary and Fab Friday.
CCMC266
I am really digging the fall colors today! This is the second post in a row that I've used Crush Curry and I only have one full sheet of cardstock left of it!  I tried my best to make a birthday card that I could give to anyone and I thought these colors helped me out with that.
Okay, okay, I may have added a little row of bling at the bottom of the...I just realized that I have no idea what that thing even is. lol Anyway, a little bling never hurt anyone and that...thing...needed something to dress it up, so bling it was!  

Stamp Set: Timeless Talk
Cardstock: Crushed Curry, Tangerine Tango, Very Vanilla
Ink: Crushed Curry, Early Espresso, Tangerine Tango
Accessories: Rhinestones, Dimensionals

Friday, August 30, 2013

Migraine, migraine, go away!

I woke up with a migraine at 3:00 this morning and took two migraine pills, aka caffeine pills. Bad idea!  I spent from 3:00-6:30 doing dishes, folding laundry, dusting, organizing...and then I had to get the kids up and ready for school and drop them off at the bus. By the time I got back to my house at 7:45 I was exhausted and ready for a nap. HOWEVER, I wanted to enter a few challenges today, so I instead decided to make a card. :) I made it for the challenges at The Friday Mashup and Freshly Made Sketches.
The mashup is to create a project using elements on your project that start with A, B and C, and to use a 1-2-3 recipe (1 embellishment, 2 stamp sets, 3 colors).  Here's what I used:
A-Acorn
B-Burlap
C-Crushed Curry
1 embellishment-Burlap ribbon
2 stamp sets-Truly Grateful, Wonderfall
3 colors-Crushed Curry, Early Espresso, Cajun Craze

It feels good to get back into using my fall stamp sets. My old sets are a little dusty! lol Funny that it is just now starting to feel like summer around here. Oh well, I am NOT complaining because you all know how I feel about winter and cold weather. ;)

Stamp Sets: Truly Grateful, Wonderfall
Cardstock: Crushed Curry, Very Vanilla, Cajun Craze
Ink: Crushed Curry, Cajun Craze, Early Espresso
Tools: Blender Pen
Accessories: Burlap Ribbon


Thursday, August 29, 2013

Spring Cleaning

I know it's not even close to Spring around here, but I have been doing some cleaning lately!  Thanks to Pinterest, I have found all kinds of cleaning tips and solutions to make. And instead of JUST pinning them, like I usually do, I have actually been trying them out!  Cleaning takes a lot of time though so I haven't had much time to craft!  I want to keep my blog somewhat current though so I did something simple for today. :) I have used the challenges at Dynamic Duos and retro sketches for my card today.
I really liked Crisp Cantaloupe when it was first revealed as a new In Color, but I haven't really used it so this was somewhat of a challenge for me!  
As you can see, I've done some more stamping with my blocks!  This time I started with stamping full strength at the bottom in Calypso Coral and then continued stamping off three more times. Then I started there in the center with Crisp Cantaloupe and stamped it off three more times as well. This is a SUPER easy way to make a color blocked background!  My flower is just three sizes of circle punches that are snipped and layered. I wanted a little bit of dimension to it since my card was so simple.

Stamp Set: Yippee Skippee
Cardstock: Calypso Coral, Crisp Cantaloupe, Whisper White
Ink: Calypso Coral, Crisp Cantaloupe
Tools: 1", 1 3/8", 1 3/4" Circle Punches, Apothecary Art Framelits
Accessories: Vintage Button, Dimensionals

Tuesday, August 27, 2013

Live the Life you've Imagined

I just love that sentiment that is in the Really Good Greetings set and thought it would be perfect when paired with the bicycle image from Timeless Talk.  Together they worked great for our photo inspiration challenge at Addicted to Stamps and More!
I fell in love with the colors in this photo instantly and used that for the inspiration for my card.  I also liked how there was one main image, so I did the same on my card.

I'm bummed that my lighting is so off in my stamping studio because it is really supposed to be red but it looks pink in the photo. Grrrr!!!  I started with my new favorite technique, inking, stamping and spritzing my big block and then rubbing the cardstock onto it. I then die cut the window and turned it into a shaker frame by putting a Window Sheet behind it and securing the sides with strips of Dimensionals. The inside is filled with silver glitter.  My kids have had a blast shaking all that glitter around. They think it's so funny to cover the image completely with the glitter and say "Oh no, it's ruined!" lol So, apparently the glitter shaker card is a success, at least in their eyes. :) 

Stamp Sets: Gorgeous Grunge, Off the Grid, Really Good Greetings, Timeless Talk
Cardstock: Basic Gray, Real Red, Smoky Slate, Whisper White
Ink: Basic Gray, Real Red, Smoky Slate
Tools: Circle Framelits, Large Block, Spritzer with water
Accessories: Silver Glitter, Window Sheets, Dimensionals

It's gonna be a hot one!

Well the kids are now back in school and it's finally starting to look like summer around here! lol It's supposed to get up around 90 degrees, so it is a great day to go to the Splash Pad with Easton, my cousin, Mandy, and her little girl, Sophie.  That means it was a Clean and Simple kind of card day so we can play for the rest of the afternoon!

I found this cute little sketch at CAS(E) this Sketch and paired it with the color challenge at colourQ since it worked perfectly with the stamp I had already chosen to use.
I was quite bummed to see that Tag It was one of our stamp sets to receive at Convention, as it was one of my least favorite stamp sets in the catalog. I have made up for it with Gorgeous Grunge though, another one that we got that you have seen me using a ton! lol Anyway, I wanted to make a birthday card for Easton, who will be turning 5 in a few weeks, and I knew he would love that little birthday lizard.
He is pretty cute, so I'm sure I will be using it again.  I thought the Argyle Embossing Folder looked kind of like lizard skin, so that's why I chose that one. I might have to find a googly eye to put on there for Easton. He would love that. No time to search today though...it's off to the Splash Pad we go on this hot summer day!

Stamp Set: Tag It
Cardstock: Bermuda Bay, Whisper White
Ink: Bermuda Bay, Calypso Coral, Elegant Eggplant, Old Olive
Tools: Ovals Collection Framelits, Argyle Embossing Folder

Sunday, August 25, 2013

Another Thank You

As soon as I saw  Stampin' Up!'s latest Photopolymer stamp set, Another Thank You, I put my order in for it immediately!  I instantly fell in love with that big 'thank you' that you can see in the center here.

Another Thank You Photopolymer Stamp Set From Stampin' Up!

It was featured on the front of our demonstrator magazine, Stampin' Success, in a card that looked like the background had been watercolored. I loved the look and decided to do something similar.

For my card, I colored directly on my biggest acrylic block with Pool Party and Tempting Turquoise markers. I then stamped Off the Grid and some of the splotches from Gorgeous Grunge on it in Bermuda Bay. After it was all inked up I spritzed it with some water and put a piece of Whisper White on top of the block, rubbing the color onto it with my hand.  I dried it a bit with my heat tool before stamping the big 'thank you' in VersaMark and embossing it with black embossing powder.  The stitches on the side are faux stitches. I just poked the holes with my paper piercing tool and then connected them with my Bermuda Bay marker.  This was such a simple card but I absolutely love it!  You will be seeing that background technique a lot from me, I'm sure. It's one of my favorites!

Stamp Sets: Another Thank You, Off the Grid, Gorgeous Grunge
Cardstock: Bermuda Bay, Whisper White
Ink: Bermuda Bay, Tempting Turquoise, Pool Party, VersaMark
Tools: Paper Piercing Tool, Essentials Paper-Piercing Pack, water in spritzer, Heat Tool
Accessories: Black Embossing Powder

Recycled Cardmaking

Black Tie Fridays is back in business!  Yay!  It was one of my favorite challenge websites and they took some time off because the designers had a lot going on.  But they are back with a fabulous challenge that I couldn't wait to try!
This was the perfect challenge for me because I am one of those crafters that sees things that would just be perfect for a card, and I keep them.  Needless to say, a lot more sits unused than used. :)   For my card, I started with the sketch at Create with Connie and Mary.
 CCMC265
If you are getting the My Paper Pumpkin, you know that each kit comes lovely wrapped in beautiful Pool Party tissue paper. So that HAD to make an appearance on my card. :)  I also just received something that was wrapped in some nice little bubble wrap so I wanted to use that too.

I used the tissue paper to make a flower using this tutorial from splitcoaststampers. They actually used facial tissue instead of tissue paper, but I just cut my tissue paper to the size they suggested and it worked just fine. My tissue paper was kind of tore up from my excitement of opening my My Paper Pumpkin, so my flower is very...distressed we will call it. lol I colored the edges with a Bermuda Bay marker and added a pretty vintage brad in the center.  For my background, I colored on the bubble wrap with Pool Party, Summer Starfruit and Bermuda Bay markers, then pressed it onto Whisper White cardstock.  I love how it turned out!  My sweet little Easton wanted to pop the bubbles when I was done and I was like "Back AWAY from the bubble wrap!"  I may need it in the future! :) 

Stamp Set: Perfectly Penned
Cardstock: Bermuda Bay, Summer Starfruit, Whisper White
Ink: Bermuda Bay, Pool Party, Summer Starfruit
Tools: Bubble Wrap (is that a tool? lol)
Accessories: Vintage Brad, Tissue paper


Friday, August 23, 2013

Stamp Camp Tonight!

This is one of my favorite nights of the month because it is time for Stamp Camp!  I hold my monthly card and scrap camps together, as I don't have that many customers. I would LOVE to have more though. We have so much fun and lots of laughs.  Here is another one of the cards that I have planned for tonight. This one came together really fast because I had already made the background when I demonstrated the Smackin' Acetate Technique at my Mini Convention last month.


Now that I've started using Spread the Joy, I just can't stop!  I wanted to keep this card simple so it doesn't distract from the beautiful background and stamp. I hope the ladies enjoy this one as much as I do!  I'll be back to share another Stamp Camp card tomorrow. I have a few that I made yesterday with some new supplies that I just got in, including the Label Card Thinlits, Envelope Punch Board to make a cute coordinating envelope, and  Another Thank You Photopolymer stamp set!

Thursday, August 22, 2013

August My Paper Pumpkin

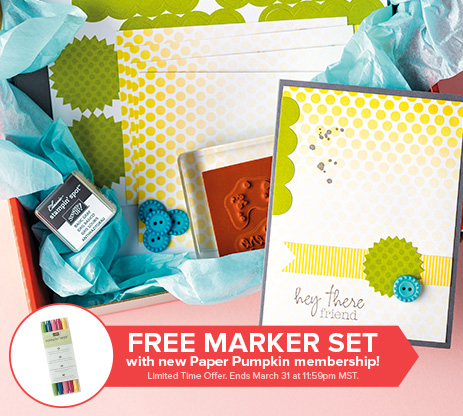
Are you receiving My Paper Pumpkin? If not, this month it the perfect time to join!  Use the promotion code PUMPKINDEAL to join before August 31st and pay only $10 a month for the first two months, plus tax where applicable.  Shipping is included!  Go to www.mypaperpumpkin.com to sign up today!  No matter when you sign up, your first month you will receive this Welcome Kit:
Then the following month you will receive the kit of that month.  This month's kit is called Pedal Praise and I just love it!  Here is one alteration that I did with mine:
Isn't that bicycle adorable?!  They are very popular in the crafting world right now.  I added some punches, cardstock and bling to mine but they are cute just the way they arrive for you to assemble too!  At this great introductory price, they also make great gifts for the beginning crafters in your life. Do you have children, grandchildren, neighbor kids, etc that like to craft with you?  Then this would be a great birthday present for them!  Don't forget to sign up by August 31st with the promo code PUMPKINDEAL to take advantage of this special offer!  

Wednesday, August 21, 2013

Fall Banner Class

I'm so excited about Stampin' Up!'s new Build-a-Banner kits that are in the Holiday Catalog.  I finished my first one today and I wanted to share it with you.  I will be having three banner classes: fall, winter and Christmas.  The cost for each class is $20 or $50 if you prepay for all three banner classes by this Friday, August 23rd. The fall banner class will be Friday, September 6th and this is the banner we will be creating. You can choose any word that you would like, up to 6 letters.
If you would like to sign up for this or any of my banner classes, email me at brettg12@aol.com. Deadline to sign up for the fall banner class is this Friday, August 23rd.

Tuesday, August 20, 2013

Spread the Joy

If you haven't seen this new stamp set yet, you MUST check it out!  This stamp set was created by one of Stampin' Up!'s employees, Emily Montoya. In April, Stampin' Up! employees were given the challenge to create a "bucket list" stamp set. Emily "wanted to make a set that could be versatilve and usable for lots of different things." Employees fell in love with her design and voted the set to victory!
Spread the Joy Clear-mount Stamp Set
I'm so glad they did!  I am in love with this set, as it is totally different from anything that I own.  However, since it IS so different, I have been finding it a bit challenging for myself to create with. Soooo, I have challenged myself to start working with it. I created a card for Friday's stamp camp that I will be sharing later this week using the large oval with all of the sentiments.  Today our challenge at Addicted to Stamps and More is CAS, so I chose to use the little sailboat, along with the challenges at Dynamic Duos and clean&simple.  

I thought these colors would be perfect with the sailboat, and I used the Dessert Option of embossing as well. This ended up being one of those CAS cards that I absolutely love!  I love it when I love my own cards. It doesn't happen all that often but when it does it makes me smile. :)
Since I already had a sentiment on my image, I dry embossed a little strip that I thought looked like waves above my panel.  I added rhinestones within the embossed strip to mimic the sketch.  I really like the way it turned out. I love CAS cards. :)

Stamp Set: Spread the Joy
Cardstock: Basic Black, Pool Party, Whisper White
Ink: Basic Black, Pool Party
Tools: Lattice Embossing Folder, 1 3/8" Circle Punch, 1 3/4" Circle Punch, Needlepoint Border Embossing Folder
Accessories: Rhinestones, Dimensionals

Happy 34th Birthday, Baby!

Yesterday was my sweetheart's 34th birthday and I wanted to share his birthday card, which is also a card we will be making at Card Camp on Friday.  I am happy to report that, after 5 months of waiting, Brett is now just as old as I am. :) He loves to make fun of me and say that I am older than him. Well, Hun, we are now the same age, so you can't make fun of me anymore! :)  At least for another 7 months or so. lol

I found this awesome sketch at retro sketches for his card. I just LOVE their sketches and have to play each week. I get so mad at myself when I miss one of their challenges! :)
I just love that cut-out and will definitely use that idea again!  It works great with Framelits, especially now that I have the amazing Magnetic Platform, which will hopefully be available to order again soon. I chose to use the Circle Framelits.  I think it would also look cool with the Floral Frames Framelits, but that was a bit too feminine for my sweetie's card. :)
I used the Season of Style DSP stack here. I love it because the colors are great for Christmas, but the patterns can be used for any time of year!  I think they are very masculine. I grunged mine up with my favorite...you guessed it, Gorgeous Grunge. :) I stamped the anchor on the back-side of my leftover dsp, which is large white polka dots on a Crumb Cake background, and fussy cut it out. Don't you just love that big sentiment too?! I am not much on tiny sentiments, and this one is just perfect for a masculine card in my opinion!

Stamp Sets: The Open Sea, Sassy Salutations, Gorgeous Grunge
Cardstock: Chocolate Chip, Old Olive, Whisper White
Ink: Cherry Cobbler, Chocolate Chip, Crumb Cake, Old Olive
Tools: Circles Framelits
Accessories: Early Espresso Baker's Twine, Dimensionals 

Dress Up Fun

I just realized yesterday as I was playing in my scrap room that I have never used my Dress Up Framelits!  I found the perfect sketch at Unscripted Sketches.  They are doing a Flashback series, so this is one of their sketches from the past.  I thought it would look great with this beautiful color combination from Create with Connie and Mary
US_FlashbackSketch69CCMC264

I think this might be my first time ever using Pistachio Pudding, which surprises me because I love the color!  I think it's such a soft and feminine shade of green, perfect for a summery dress.

If you are attending Stamp Camp on Friday, this is one of the cards we will be making!  It's not too late to RSVP.  You can choose to do 4 12x12 scrapbook pages or 5 cards.  If you received last month's My Paper Pumpkin, I will have 4 scrapbook pages that you can choose to do with the supplies you received.  If you did not, I have things you can use to alter the pages so they will still be really fun!  Cost is $15. Come any time after 4:00. 

If you are not yet signed up to receive My Paper Pumpkin, you can sign up this month for just $10 for the first two months by visitingwww.mypaperpumpkin.com and entering the promo code PUMPKINDEAL. I've been having a ball getting my surprise kit each month.  The scrapbook pages that I created using last month's banner kit are adorable, if I do say so myself. :)  If you have any questions, don't hesitate to ask! 

Stamp Set: Yippee Skippee
Cardstock: Blushing Bride, Pistachio Pudding, Smokey Slate, Whisper White
Ink: Blushing Bride, Pistachio Pudding
Tools: Fancy Fan Embossing Folder, Dress Up Framelits, Decorative Label Punch, Blossom Party Originals Die
Accessories: Pearl

Saturday, August 17, 2013

Fall is coming quickly!

I feel like I have had no summer this year. It was hot here ONE week this summer, and we were vacationing in Utah so I didn't even get to enjoy swimming in my pool. :( The one good thing about this fall weather is I feel like I can get out some of my fall stamps and start using them. I know, I know, there is no law that says I can't use them all year long, I just feel  more comfortable using them when it FEELS like fall. I know, I'm a dork. :)

This card is another one of the cards that I made for my dear Brett's birthday, so I am entering in the birthday contest at SUO Challenges as well as the challenges at Freshly Made Sketches and Handstamped Sentiments.

Aren't these just the perfect colors for some leaves? I thought so too. :) lol
It sure was a pain trying to get a good picture of this card today. I don't know why, but my Very Vanilla cardstock is trying to disguise itself as white. :( For my leaves, I inked them up with the main color first and then added the other two colors with my blender pens so I didn't get the tips of my markers dirty.  The back panel is Core'dinations cardstock that is embossed and then sanded. I still don't have the Chalk Talk Framelits but that one was easy enough to hand cut. Much easier than those leaves that I fussy cut! :) 

Stamp Sets: Chalk Talk, Magnificent Maple
Cardstock: Early Espresso Core'dinations, Crushed Curry, Very Vanilla
Ink: Crushed Curry, Early Espresso, Pear Pizzazz
Tools: Decorative Label Punch, Woodgrain and Perfect Polka Dots Embossing Folders, Blender Pens, sanding block