Tuesday, February 25, 2014

Vivid Vases

Last week was a crazy week with Brett's grandma passing away, and I really have not felt like even being in my stamping room until today. I think because Brett was home and I just wanted to spend time with him! Now that he is back to work, I am feeling a bit back to normal.  Good thing, since we have a new challenge at Addicted to Stamps and More! :) This week is our CAS challenge.  We are joined by Guest Designer Cathy once again this week. Make sure you hop on over to her blog and see the beautiful birthday card she has created for us this week!  

I used the challenges from Dynamic Duos and The Paper Players on my card this week. I had a lot of challenges to choose from since I haven't played in any for a week! 
These bright colors were just what I needed after the week I had!  They just so happen to look beautiful with my new Vivid Vases stamp set, too. 
Instead of Washi Tape or strips of cardstock, I decided to use these fun stamps from Perfect Pennants to mimic the layers in the sketch. I thought it was a little bit different, and they were very easy to line up and layer a little bit.  I just realized that this fits into my Ten-Minute Tuesday challenge I like to give myself too. :)

Stamp Sets: Perfect Pennants, Vivid Vases
Cardstock: Tangerine Tango, Whisper White
Ink: Black StazOn, Melon Mambo, Tangerine Tango, Wild Wasabi
 

Wednesday, February 19, 2014

Just Sayin'

Brett's Grandma passed away early Tuesday morning, so my thoughts have been elsewhere the past couple of days and I haven't really felt like doing much. I was inspired by the color challenge at Dynamic Duos though, since they are our school colors, so I made a quick little notecard to put in Janae's lunch box.
Just Sayin' is such a cute little set, and I know that Janae will love it. That is one thing that is special about my kids...they always appreciate my handmade cards!  Even the boys treasure them and want to save them forever. Longer that I want them sitting around actually! :)
I was going to put a white banner on the inside to write on, but I thought she would think it was way cooler if I used my white chalk marker. :) Don't you just love these little banners? I really cannot get enough of them! This one with the chevrons is my favorite and I think it looks so crisp stamped in black!

Stamp Sets: Just Sayin', Banner Blast (SAB)
Cardstock: Daffodil Delight, Basic Black, Whisper White
Ink: Black StazOn
Tools: Banners Framelits, Bubble Word Framelits, Banner Punch, Decorative Dots Embossing Folder
Accessories: White Baker's Twine, Dimensionals

Tuesday, February 18, 2014

Addicted to Stamps...Holiday

It's time for another challenge at Addicted to Stamps and More! and this week the challenge is to make a holiday card.  You can choose whatever holiday you want, or this word might mean something completely different to you. You get to decide!

Our guest designer this week is Cathy.  Make sure you pop on over to her blog and give her some love!

I have used the Stripes challenge at Just Add Ink and the Splatter/Sketch challenge at The Friday Mashup! for my card.
I believe the next holiday that my family celebrates is Easter, so I decided to go that route. I remember having a die a few years ago that made really cute Easter baskets, but it has since retired, so I used my Ovals Collection Framelits to do something similar. And it actually worked the FIRST time!  Don't you just love it when that happens? ;) 
The basket was really easy to make. I put the large scalloped oval on my magnetic plate (on top of the clear plate, of course!) and placed the third largest oval inside of it. Then I placed the top clear plate only 2/3 of the way over the two framelits. This caused it to cut only the top portion of both ovals. I then removed the inside oval, placed the clear plate over the entire scalloped oval, and ran it back through. This is how the bottom half of the basket got cut. The last step was to go in with my paper trimmer and cut off the inside flap that was hanging there and to emboss the basket. Pretty easy for a cute basket!   

Stamp Sets: Delightful Dozen, Gorgeous Grunge, Party Pennants (My Paper Pumpkin)
Cardstock: Pink Pirouette, Pistachio Pudding, Soft Sky, So Saffron, Whisper White
Ink: Pink Pirouette, Pistachio Pudding, Soft Sky, So Saffron, Wisteria Wonder
Tools: Square Lattice Embossing Folder, Stripes Embossing Folder, Ovals Collection Framelits
Accessories: Wisteria Wonder Chevron Ribbon

Sunday, February 16, 2014

The Stamp Review Crew: Gorgeous Grunge Edition

Wow, has this month ever FLOWN by!  It's the third Monday of the month, and you know what that means? A new edition of The Stamp Review Crew!


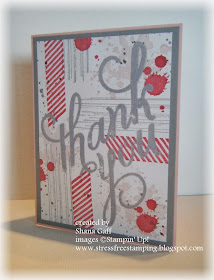
This is one of my favorite stamp sets of all time. I love using it to make backgrounds for my cards, like I have done here on these two thank you cards:

You can cover your entire background or just part of it. Either way, I think it looks fabulous!  I also tried some new techniques with it.  For this next card I used the small splatters in Marina Mist and Silver Encore ink to make snow. We have had tons of it here in Northeast Indiana, so this card is quite fitting for this time of year!
But since I have had enough of this snow, I also wanted to do some cards with a warmer feeling to them! I think the prettiest time of year here is fall, so I pulled out some of my favorite fall colors for my final card: 

I think the splatters make great leaves!  I used the baby wipe technique and added Daffodil Delight, Garden Green, Cajun Craze and Cherry Cobbler ink to a baby wipe and used that as my ink pad.  I really wanted my tree to sparkle though, so I embossed some of the smallest splatters with Gold Embossing Powder on the tree and on the ground. While I had my baby wipe inked up, I took advantage of it and inked up some more sheets of Very Vanilla cardstock with splatters for future use.  It's like having homemade DSP on hand!  


I hope you enjoyed my projects! As you can see, Gorgeous Grunge is an extremely versatile set and a must-have in my opinion! :)   To continue on with the hop you can click on the tabs to head on over to see what Holly has created for us. Or if you are lost, you can find the complete hop at the bottom! :) 


Blog roll
  1. Heidi Baks  runningwscissorsstamper.blogspot.com
  2. Cindy Beach stampspaperandink.typepad.com/
  3. Beth Beard   mylittlecraftblog.com/
  4. Adriana Benitez  escape2stamp.com
  5. Tanya Boser   tinkerin-in-ink.blogspot.com
  6. Debra Burgin  heartfeltinkspiration.com/
  7. Jill Coleman  jillstamps.com/
  8. Deb Currier  artfeltimpressions.blogspot.com/ 
  9. Mike Funke    stampin-style.typepad.com/
  10. Shana Gaff   stressfreestamping.blogspot.com
  11. Holly Krautkremer  rubberredneck.typepad.com
  12. Mary Rindal   maryrindal.com
  13. Martha Stewart  seasonsofstamping.com/ 
  14. Dawn Tidd   tiddbitsfromdawn.typepad.com
  15. Lisa Young   addinkandstamp.blogspot.com/ 
  16. Kerry Willard Bray  kerrywillardbray.com
  17. Paula Wright  paulastamps.blogspot.com/
  18. Rita Wright  ritascreations.blogspot.com/
  19. Betty Traciak kittystamps.blogspot.com
  20. Nancy Smith iguanastamp.wordpress.com

Saturday, February 15, 2014

Perfect Blend

It's time for a new challenge at Addicted to CAS and it is one that I know many of you will love. :)
I myself do not drink coffee, nor do I like the smell of it, but I do LOVE the Perfect Blend stamp in the annual catalog, so I had something to work with! lol
I could not get a good photo with my normal backdrop, so I opted for a Strawberry Slush backdrop instead. It wasn't until I had my photo all edited that I realized the cardstock looks white instead of Very Vanilla!  Oh, well, you get the idea!  I thought the splatters from Gorgeous Grunge looked like coffee grounds when stamped repeated, so I embossed them in Early Espresso embossing powder to make them really stand out.  No Embossing Buddy needed here because I WANTED the extra little splatters!  The coffee cup is stamped on three different colors and I cut the pieces apart and assembled them, with the lid on some Dimensionals for a little pop.  Even though I don't like coffee, I sure think this is a cute set! :) 

Stamp Sets: Gorgeous Grunge, Perfect Blend
Cardstock: Baked Brown Sugar, Strawberry Slush, Very Vanilla
Ink: Early Espresso, VersaMark
Tools: Heat Tool
Accessories: Early Espresso Embossing Powder, Dimensionals

Friday, February 14, 2014

So Very Grateful

Wow, have I been finding some great challenges in blogland lately!  I almost feel like I am cheating when I am making cards because of all of the wonderful sketches and color combinations I am finding. :)  I found this sketch at Try Stampin' On Tuesday and  color combination at Nacho Average Challenges.
At Try Stampin' On Tuesday they also had a twist to use hearts or flowers. I have been doing lots of hearts for Valentine's Day, so I decided to go with the flowers.  


I don't think I have ever inked up this Happy Birthday stamp from Blue Ribbon, but it worked perfectly for this sketch!  I just love coloring in parts of the flowers from So Very Grateful. It is just so striking, especially with the black!  One thing that doesn't show very well in the photo is that I dry embossed the floral panel with the Fancy Fan Embossing Folder.  The added texture looks so elegant in person!


Stamp Sets: Blue Ribbon, So Very Grateful
Cardstock: Basic Black, Blushing Bride, Very Vanilla
Ink: Black StazOn, Blushing Bride
Tools: Scallop Circle Punch, Circle Punches, Decorative Dots Embossing Folder, Fancy Fan Embossing Folder
Accessories: Rhinestones, Dimensionals

Thursday, February 13, 2014

In love with COLOR!

I am not very good at all at coming up with my own color combinations, so I LOVE looking for fresh ideas. I found this beautiful combination at The Paper Players and paired it with the sketch at Mojo Monday.
I would have NEVER put these colors together but they are just fabulous together!
I had so much fun making this card and combining the different elements.  I don't usually do a lot of layers so this was a change for me! This will be my main Valentine card for Brett. I like to give him several cards throughout the day/weekend (since there is no shortage of lovey dovey cards around here! lol), but this one will be the one that I write my long and gushy message in. :)

Stamp Sets: Hearts a Flutter, Happy Day, Vivid Vases
Cardstock: Midnight Muse, Crisp Cantaloupe, Whisper White, Gold Foil
Ink: Midnight Muse, Gold Encore
Tools: Hearts a Flutter Framelits, Decorative Dots Embossing Folder, Pretty Print Embossing Folder, Scalloped Tag Topper Punch
Accessories: Gold Sequin Trim, Crisp Cantaloupe Stretch Ruffle Ribbon, Dimensionals

Wednesday, February 12, 2014

Life in the Forest

My favorite time of the month is when my monthly Stamp Camp order arrives because that means new toys!!! Yay!  This month I got some things that are different from what I usually order, just to change things up a bit. CASology is having a fun challenge that worked perfectly with two of my new sets.
 
When I was thinking of bold, I thought about a bold statement, so I decided to make a fun birthday card. The color I chose is also pretty bold. :)

"You HOW old?" I thought that was a pretty bold question to ask someone on their birthday. :) For my fox, I stamped him once on DSP and once on Whisper White cardstock. I then used my craft night to carefully cut out the parts that I wanted to be orange and adhered them to the Whisper White cardstock. I love how it turned out and I will definitely be doing this again!

On a side note, I wanted to share a picture with you of my "helper," Cali.   As you can see, she is there by my Big Shot and where I take my photos.  She also likes to sit right next to my Tabletop Trimmer. I'm always moving her so I don't cut her tail!


Stamp Sets: Life in the Forest, Just Sayin'
Cardstock: Tangerine Tango, Whisper White, Pink Pirouette
Ink: Black StazOn
Tools: Word Bubbles Framelits
Accessories: Retired Brights DSP stack, Dimensionals

Tuesday, February 11, 2014

It's MARKER time!

I usually struggle with the Make Your Mark challenges at Addicted to Stamps and More! but this week I knew what I wanted to try.  It worked out perfectly with the color challenge at The Friday Mashup! and the sketch challenge at retro sketches too!
The colors this week at The Friday Mashup! are Cherry Cobbler, Primrose Petals, Soft Sky and Marina Mist. Perfect choices for the idea that has been running around in my head. :)
I've seen a lot of free-hand markering in blog land.  Well, the closest I knew I could get was to use a ruler! :) Each of my stripes is using the brush tip of my Stampin' Write Markers and a ruler!  Now, I do have a few tips for you. I was using a clear ruler, and the color stayed on the ruler each time, causing the colors to mix together and bleed. I found that the easiest way to prevent this was to start with the lightest color (Soft Sky) and do all of those lines first. Then I went in with Marina Mist and added those lines, and so on. I did not want my lines to have a pattern, so this was very easy to do! Also make sure that you wipe off your ruler in between colors so they don't mix together!  Obviously, this was Take Two for me. :) 

Stamp Set: Tag It
Cardstock: Cherry Cobbler, Marina Mist, Whisper White
Ink: Cherry Cobbler, Marina Mist, Primrose Petals, Soft Sky
Tools: Adorning Accents Embossing Folder, Ruler
Accessories: Subtles Candy Dots, Rhinestones, Subtles Button, Crystal Effects

Monday, February 10, 2014

Countless Sayings 2

If you visit my blog very often, you have probably noticed that I LOVE this photopolymer stamp set!  I especially love the big words that can be colored in or stamped in!  I was visiting my friend Aimee's blog a few days ago and saw a new challenge site that she had discovered, Fusion Card Challenge. It looked like a ton of fun so I decided to play along!
I decided to jump right in with the fusion and decided to use the photo inspiration and the sketch. 
I stamped the "Sweet" in Black StazOn ink and then colored it in with my Aqua Painter using Real Red ink. I then stamped the little hearts over the letters with Cherry Cobbler ink. I thought it would look really cool on Dimensionals, so I fussy cut it and then popped it over my die-cut hearts.  Of course, no Valentine's Day card is complete without some bling, so I added the silver glimmer hearts to jazz it up.

Stamp Sets: Countless Sayings 2, Oh Goodie
Cardstock: Cherry Cobbler, Whisper White
Ink: Black StazOn, Cherry Cobbler, Real Red
Tools: Hearts Collection Framelits, Adorning Accents Embossing Folder, Owl Builder Punch, Aqua Painter
Accessories: Silver Glimmer Paper, Dimensionals

Watercolor Wonder Notecards

Have you used these yet?  They are in the Occasions Catalog and were one of the first things on my order. I just love them!  I wanted to get the most for my money though so I have been cutting them in half so I can get two full-sized cards out of one notecard.  Today I was able to do a layering effect using the two sides of one of the cards and it fits in for the challenge at Seize the Birthday perfectly!
This is one of my favorite cards that I have made in a long time, and it really only took me about 10 minutes to pull it together!  I stamped the "Make a Wish" on the extra part of the card that I had cut out and then cut it into a tag shape. I used my paper cutter to cut a slit in the top, which I pulled the Daffodil Delight Chevron ribbon through and then wrapped it with a scrap of Gumball Green Stitched Satin Ribbon.  The tag is on Dimensionals so you can see that it is layered. I can't wait to give this birthday card away!

Stamp Set: Perfect Pennants
Cardstock: Calypso Coral
Ink: Calypso Coral, Gumball Green, Island Indigo
Accessories: Daffodil Delight Chevron Ribbon, Gumball Green Stitched Satin Ribbon, Dimensionals, Watercolor Wonder Notecards

Saturday, February 8, 2014

Happy Day

I've been getting back into making rosettes and decided to try something a little different for the sketch at CAS(E) this Sketch!
I was originally playing with some scored Designer Series Paper and put it in a rainbow shape. Then it hit me...use the colors of cardstock to actually make a rainbow! :) 
I used hot glue to glue the blue layer down to scrap cardstock. I then added the yellow and red layers on top of it and pulled it off of the scrap cardstock. Then I was able to add it to my sponged layers with more hot glue.  My card base is Whisper White cardstock that I sponged with Pacific Ink to mimic the clouds in the center of the rainbow.

Stamp Set: Happy Day
Cardstock: Daffodil Delight, Pacific Point, Real Red, Whisper White
Ink: Black StazOn, Daffodil Delight, Pacific Point
Tools: Scallop Circle Punch, Simply Scored, sponges

Thursday, February 6, 2014

No Layers!

This is always a challenge for me, but I had a lot of fun participating in the No Layers challenge at SUO Challenges. I combined it with the color challenge at Color Throwdown.
I wanted to do some coloring so I went to one of my new favorite stamp sets from the Occasions Catalog, So Very Grateful. It is so much fun to color! 
I started out by stamping my frame and sentiment. Then I stamped a second frame on a sticky note, cut it out and covered the frame on my card so I could stamp the flowers over it. It actually looked very cool without even being colored in, but I wanted to participate in the color challenge, so I colored in some of the leaves with Pistachio Pudding and Crumb Cake, and some of the flowers with Pink Pirouette and Real Red. I really like the look of leaving some of them white!

Stamp Sets: Everything Eleanor, Feel Goods, So Very Grateful
Cardstock: Whisper White
Ink: Black StazOn, Crumb Cake, Pink Pirouette, Pistachio Pudding, Real Red
Tools: Sticky Note

Wednesday, February 5, 2014

Snowed in...again!

When will this snow ever end?!  I just heard we are supposed to get more this weekend, so I guess not anytime soon!  Apparently we have almost already reached the record amount of snow in February, and we are only 5 days in. That is just crazy.  I haven't even felt like making cards anymore. That may be because having the whole family home means a LOT of Mario Kart on the Wii. :) I did manage to get a quick card in today with some leftovers from my shaving cream card I made on Sunday.  I used the color combo from Colour Me...Monochromatic and the Cue Card at CASology.
I had this beautiful purple panel lying on my counter top and I wasn't sure what to do with it...until I saw these two great challenges!
Unfortunately, purple is really hard to photograph in my room!  This looks so much better in person. I just love the swirlies the shaving cream creates.  I rarely keep retired stamp sets, but my all-time favorite song is "Carry On" by fun. so this one will stay put for a while. :) I thought it was a little different for the code word too, and I was glad to use it again!  

Stamp Sets: Carry On, Gorgeous Grunge
Cardstock: Brushed Silver, Whisper White
Ink: Wisteria Wonder, Elegant Eggplant, Perfect Plum, Silver Encore Metallic Ink
Tools: Chalk Talk Framelits, Shaving Cream
Accessories: Rhinestones

Tuesday, February 4, 2014

Num-Num

Today I decided to play with some "toys" that I haven't played with in a while. :) In fact, I don't think I've EVER used the Oh, Goodie! set that I got at Convention!  I kind of felt guilty because I am always telling my kids that they have so many toys that some of them rarely get played with.  Oops! I guess I do the same thing. lol

I used the challenges at Dynamic Duos, retro sketches and The Paper Players.
The only thing I have that is remotely close to food is my cupcake punch, I decided to start there.  After that it quickly came together and I really like the outcome a lot!
I used my Stamp-a-ma-jig to get the num-nums :) all lined up perfectly. Then I assembled my cupcake and popped it up on a few Dimensionals.  I really wanted to look more like the sketch, so I added the three Silver Glimmer circles under my white cardstock.  I think this will be a good child's birthday card, and it seems like mine are invited to birthday parties all the time, so now I have one on hand instead of rushing at the last minute to make one! :)

Stamp Set: Oh, Goodie!
Cardstock: Island Indigo, Real Red, Whisper White
Ink: Island Indigo, Real Red
Tools: Cupcake Builder Punch, Square Lattice Embossing Folder, Fancy Fan Embossing Folder
Accessories: Silver Glimmer Paper, Dimensionals 

I love you, I love you, I loooove you!

Does anyone else love that line from Elf as much as I do? :) It's the part where Elf first meets his dad and his dad thinks he's a Christmas gram. :) Which leads to another line that my kids say ALL the time...What's a Christmas gram? I want one!  Wow, a major sidetrack!  Moving on...lol

Our challenge at Addicted to Stamps and More! is an easy one this week...Anything Goes!  I was reading online somewhere that someone missed the stencils that Stampin' Up! used to sell, so I decided to use my framelits to create my own!  I used the colors from Fab Friday and the layout and sponging challenge from The Friday Mashup.
                      

I created three separate stencils for my panel: One with hearts, one with arrows and one with the "I heart you" phrase. This way I was sure to only get the color I wanted for each stencil.  

After I sponged the colors in the stencils, I dry embossed the panel with the Houndstooth Embossing Folder and sponged the edges.  I wanted my sentiment image to look kind of like a bullseye, so I layered the circles underneath it and put an arrow through the whole thing.  This card is kind of a mod podge of different stamps and Big Shot items, but I really like how they all combined together!

Stamp Sets: For the Birds, Yippee-Skippee
Cardstock: Crumb Cake, Coastal Cabana, Real Red, Whisper White
Ink: Crumb Cake, Coastal Cabana, Real Red, Black StazOn
Tools: Essentials Paper-Piercing Pack, Circles Collection Framelits, Chalk Talk Framelits, Label Card Thinlits, Houndstooth Embossing Folder, Sponges
Accessories: Dimensionals 

Shaving Cream!

It's time for another challenge at Technique Time Tuesday and it is a fun and messy one!  Shaving Cream! I actually had to go out and buy some shaving cream because we use gel and not cream, but it's super cheap and I am glad to now have some because this is a great technique! I used this great sketch at Mojo Monday to showcase what I did with the shaving cream:
I have been trying to think of a way to use my largest banner in the Banner Framelits, and this was the perfect chance!  

Do you see all those lovely purple swirls?! That is from the Shaving Cream Technique!  I used Wisteria Wonder, Perfect Plum and Elegant Eggplant.  I just love the softness that it created. The paper even feels soft, just like a fresh shave! Who am I kidding? I can never get my legs that smooth. lol

Stamp Set: Tags 4 You
Cardstock: Elegant Eggplant, Whisper White, Wisteria Wonder
Ink: Elegant Eggplant, Perfect Plum, Wisteria Wonder
Tools: Banner Framelits, Hearts Collection Framelits, Argyle Embossing Folder, Shaving Cream
Accessories: Silver Glimmer Paper, Wisteria Wonder Chevron Ribbon, Dimensionals

Sunday, February 2, 2014

The Stamp Review Crew: Hello, Lovely Edition


Hello, Lovely is a stamp set that has seen very little ink since I got it at Convention last July.  I have always loved it, I just didn't really know what to do with it!  That's one of the things that I love about The Stamp Review Crew...we get a change to really stretch our minds and create with stamp sets that might not be our most popular choices.  I decided to make a little card tote with the Envelope Punch board, and a set of cards to put inside it. I was very proud of myself because I was able to use every single stamp in the set!
I started by making an envelope using a sheet of 8.5x8.5 cardstock, and following the directions on the Envelope Punch Board. I glued the envelope shut and trimmed off one edge of the short end.  I sponged the edges on each side and covered both sides with Epic Day This and That DSP. Then I used my circle punch to add notches on each side so I could easily remove the cards.  I used my retired Jumbo Eyelits (sniff, sniff) so I could add the ribbon handles and ensure that they would be nice and sturdy.  Decorating the belly band was my favorite part!
I was inspired to make the rosette by Amanda, who made one using this same sheet of DSP at my Stamp Camp on Friday.  I love how the chevron lines go right along with the folds in the rosette, and I just had to make one!  All of these layers are hot glued together to ensure that they will not fall apart! Next I got started on my cards. This DSP works perfectly with the Hello, Lovely set, don't you think?


I hope you enjoyed my project.  Thanks for stopping by!  You can click on the links to either go back to Jill's amazing blog or continue on to see what the talented Holly has created for us this week!
                                        
                              
Here is the complete blog roll if you get lost!
  1. Heidi Baks  runningwscissorsstamper.blogspot.com
  2. Adriana Benitez  escape2stamp.com
  3. Tanya Boser   tinkerin-in-ink.blogspot.com
  4. Jill Coleman  jillstamps.com/
  5. Shana Gaff   stressfreestamping.blogspot.com
  6. Holly Krautkremer  rubberredneck.typepad.com
  7. Yapha Mason   yaphamason.com
  8. Mary Rindal   maryrindal.com/  
  9. Nancy Smith iguanastamp.wordpress.com
  10. Dawn Tidd   tiddbitsfromdawn.typepad.com
  11. Betty Traciak kittystamp.blogspot.com
  12. Kerry Willard Bray  kerrywillardbray.com
  13. Paula Wright  paulastamps.blogspot.com/
  14. Rita Wright  ritascreations.blogspot.com/