Shana Gaff
(260)897-3911
stressfreestamping@gmail.com
Independent Stampin' Up! Demonstrator

Monday, December 31, 2012

Bootiful Occasions

I want to leave the house in about 15 minutes, but I just HAD to participate in the challenge at Stampin' Royalty today, so I threw together a card for this sketch:
This was my first time using Bootiful Occasions and the boot image fit better on a vertical piece of cardstock, so I rotated the sketch and ended up with this:
I paper-pieced the boot by stamping it three times; once on the main Very Vanilla piece, once on the DSP and once on a scrap of Very Vanilla for the little poof ball. :)  It was very easy to cut out and piece together. I think this might be the first time I have EVER done this!  I love the look and will definitely be trying it again.
 
Stamp Set: Bootiful Occasions
Cardstock: Bashful Blue, Early Espresso, Very Vanilla
Ink: Early Espresso
Tools: Snow Flurry Bigz Die, Northern Flurry Embossing Folder
Accessories: Festive Prints DSP stack, Rhinestone Basic Jewels


Sunday, December 30, 2012

Snowflake Fun

The challenge at The Friday Mashup is to make a snowflake card with Pool Party, Midnight Muse, Basic Black and Whisper White.  I thought it would be fun to send someone some snowflakes for a thank you card.  I used the sketch from Mojo Monday.
I was down to my very last strip of Midnight Muse ribbon that I got for free during one of Stampin' Up!'s promotions last fall and it worked perfect with this sketch!
 
 
I know I am always complaining about the snow, but I know there are people who never see it, so I have put some in a jar to send to them. :)  I used Illuminate Glimmer Watermark ink on the black embossed snowflakes and Silver Dazzling Details in the centers of the Midnight Muse snowflakes. I had punched the doily out for a card the other day but ended up not using it because it did not cut through all of the way. It ended up being a perfect background for my card!  I love it when I can actually use up some of these "accidents" I have lying around here. :)

Stamp Sets: Petite Pairs, Snowflake Soiree
Cardstock: Basic Black, Midnight Muse, Pool Party, Whisper White
Ink: Black StazOn, Midnight Muse, Pool Party, Illuminate Glimmer Watermark
Tools: Cannery Framelits, 7/8" Scallop Circle Punch, Large Paper Doily Sizzlet, Window Frames Framelits, Northern Flurry Embossing Folder, sponge
Accessories: Midnight Muse Stitched Satin Ribbon, Silver Dazzling Details, Dimensionals

Saturday, December 29, 2012

Faux Tile

I am so excited to play for the first time at Mynnette's challenge blog, Technique Tuesday!  The challenge this month is faux tile, which I combined with the color challenge at colourQ.
Mynnette always has amazing step-by-step directions on her blog.  Make sure to check them out if you have never done tile before!  I have done square tiles before, but never thought to make them different shapes and sizes.  I love the variety it added to my card!
I didn't have any of the now-retired Bermuda Bay, so I used Island Indigo in its place.  I did hang on to Pear Pizzazz for some reason. It is SOOO close to Certainly Celery that I guess I thought they might replace it with PP someday! :)  I loved the tile look so much that I didn't want to add to much to my card and cover it up.  A simple strip of ribbon, the sentiment and one of the doilies die cut with the smallest framelit from Floral Frames.  That framelit matched up with the stamp almost perfectly! 
 
Stamp Sets: Delicate Doilies, Lacy & Lovely
Cardstock: Island Indigo, Pear Pizzazz, Whisper White
Ink: Basic Gray, Island Indigo, Pear Pizzazz, Real Red
Tools: Apothecary Accents Framelits, Floral Frames Framelits
Accessories: Island Indigo Ruffled Ribbon, Rhinestone Basic Jewels


Friday, December 28, 2012

A new technique, a new stamp set, and a new challenge!

Lots of new things for me today!  My wonderful friend and downline Aimee got some new goodies yesterday and let me borrow them today.  How exciting!  I found some new challenge blogs this morning and loved this color combination from 4 Crafty Chicks and paired it with this fresh sketch from retro sketches:
Another challenge blog I found is put on by the AMAZINGLY talented Mynnette. I have seen her work before and WOW, it is all fabulous! My favorites are her Clean and Simple cards. Make sure you stop by her blog and check out her work!  The blog challenge Mynnette has started is called Technique Tuesday and I found this cool technique that she did back in May, Velveteen Stamping.
She has a full picture tutorial available too.  Thanks for sharing, Mynnette!  Here is what I came up using this technique and the challenges:
Here is a closer look at my Velveteen Stamping. I used the Hello, Doily background stamp with the Whisper White craft ink.  I sponged on the ink refill directly to the stamp instead of using the ink pad, so I got really good coverage.  The texture it adds is amazing!  

Oh, and did you spot the new stamp set that I borrowed from Aimee?  I absolutely love it.  It is called Feel Goods (that name totally cracks me up!) and will be available in the Spring Catalog in a few short days!
 
Stamp Sets: Feel Goods, Hello Doily, Mixed Bunch
Cardstock: So Saffron, Whisper White, Wisteria Wonder
Ink: Black StazOn, So Saffron, Whisper White craft, Wisteria Wonder
Tools: Top Note Bigz Die, sponge
Accessories: Wisteria Wonder Ruffled Ribbon, Whisper White Organza, Vintage Faceted Button
 

Thursday, December 27, 2012

Christmas Break

Well, I had my two days of Christmas break and it is back to the grind of making cards. Tough life, huh? :)  The kids are on Christmas break from school until January 8th, so there is a lot of chaos around here today, with my three kids and three that I am babysitting.  We will see how much I actually get accomplished. lol

There aren't many of my usual challenges going on right now with the holidays, but I did find some at Create with Connie and Mary and Try Stampin' On Tuesday that I wanted to play in.  This card also fits in the True Blue challenge at SUO Challenges!
2012 Create Thursday-012
Aren't those great colors for snowy weather?  We had our first big snowfall of the season yesterday, so this was fitting for a winter card.  I decided to make a winter wedding card.

When I went to my silver glimmer paper stash, I was so disappointed to see that I only had a few scraps left!  I really wanted to do the whole doily in silver glimmer but this is all I had. :(  I still love the way it turned out though!  I don't have any Pool Party DSP, so I made my own using the Delicate Doily stamp set.  This wedding card wouldn't be complete without some bling, so I added a rhinestone for the diamond on the ring.  I really like this layout!  The card is 5 1/2" square, so it would take a custom envelope.  I think I will look in to purchasing the smaller doily die so I can do a smaller version of it!

Stamp Sets: Delicate Doilies, Word Play
Cardstock: Pool Party, Whisper White
Ink: Pool Party
Tools: Large Paper Doily Sizzlit, 2 1/2" Circle Punch, 1 3/4" Scallop Circle Punch
Accessories: Pool Party Baker's Twine, Silver Glimmer Paper, Basic Rhinestones, Dimensionals

Monday, December 24, 2012

Christmas Countdown-1 Day!

'Twas the night before Christmas, and all through the house, not a creature was stirring, not even a mouse.  YES!  The kids are gone, the hubs is gone, and I am making cards!  What a great way to spend this Christmas Eve. :)  Now don't go thinking I am a big scrooge and don't enjoy time with family during the holidays. I really do!  That will just come later tonight and all tomorrow. lol

I had a lot of fun combining the challenges at Hand Stamped Sentiments and Stampin' Celebration today.

The Stampin' Celebration challenge was a photo inspiration, and I knew right away I wanted to use trees and bows and on my card.  Baby Wipe Ink Pad is my FAVORITE technique ever, and it looked so good with Lovely as a Tree that I had to make a little background strip of it too!
Doesn't that tree look fabulous with the Baby Wipe Ink Pad technique!  I love it!  I used Certainly Celery, Old Olive and my new favorite green, Gumball Green.  The back red strip is Cherry Cobbler Core'dinations, which I embossed with the Woodgrain Embossing Folder to go along with the tree theme.  This card was SOOO simple and came together in under 30 minutes. Gotta love those fast cards!  Hopefully I'll get some more done today!
 
Stamp Sets: Lovely as a Tree, Snowflake Soiree
Cardstock: Cherry Cobbler Core'dinations, Old Olive, White Glossy
Ink: Certainly Celery, Cherry Cobbler, Gumball Green, Old Olive
Tools: Woodgrain Embossing Folder, Apothecary Accents Framelits, sanding block, baby wipes
Accessories: Cherry Cobbler Polka Dot Scalloped Ribbon, Dimensionals


Sunday, December 23, 2012

Christmas Countdown-2 Days

It's Christmas Countdown and I didn't even make a Christmas card today! lol  I really liked the color combination at Stampin' Royalty, but it just didn't scream Christmas to me. :)  More floral.  I paired it with the sketch at Create with Connie and Mary.
I thought this was a cute little sketch.  I almost made a square card, but I almost never send those so I decided to just keep it a standard 5 1/2" x 4 1/4" card. 

I am down to the bare bones of my Summer Smooches DSP but I still had some Island Indigo left! :)  I also had some Lucky Limeade brads leftover from last year's Sale-a-Bration to use on the tag. I love this little tag but I always forget to use it!  I wanted to add a few more flowers to my card so I stamped and cut out the little flowers from Summer Silhouettes and added some rhinestones to the centers for a little extra bling.
 
Stamp Sets: Delicate Doilies, Summer Silhouettes
Cardstock: Riding Hood Red, Summer Starfruit, Whisper White
Ink: Lucky Limeade, Riding Hood Red, Summer Starfruit
Tools: Square Lattice Embossing Folder, Apothecary Accents Framelits, Hole Punch
Accessories: Retired SAB brads, Basic Rhinestones, Dimensionals

Saturday, December 22, 2012

Christmas Countdown-3 Days

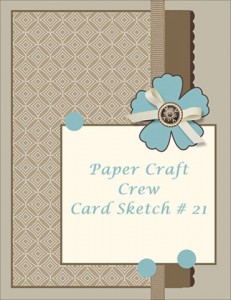
I am so excited to be playing in a new-to-me challenge today!  It is called Paper Craft Crew Challenges and this week they have a sketch challenge that I paired with the color challenge at colourQ.
PCCCS021-Sketch
I really love this color combination!  I had to substitute Riding Hood Red in for the now-retired Ruby Red. I like the subtle difference on my card between it and the Cherry Cobbler.
I thought this would be a great chance to use up some of this DSP that is in the Festival Prints DSP stack in the Holiday Catalog. Just a few more days and it will no longer be current!  I always forget about this stamp that is in Word Play.  I think this is the first time I used it this year!  I'm glad I found it just in time before Christmas!

Stamp Set: Word Play
Cardstock: Bashful Blue, Cherry Cobbler, Crumb Cake, Riding Hood Red, Whisper White
Ink: Bashful Blue, Cherry Cobbler, Riding Hood Red
Tools: 1 3/4" Circle Punch, Perfect Pennants Bigz Die, Scallop Edge Border Punch, Square Lattice Embossing Folder, 1/2" Circle Punch, Itty Bitty Punch Pack, Blender Pen
Accessories: Cherry Cobbler Baker's Twine, Dimensionals

Friday, December 21, 2012

Christmas Countdown-4 Days

The kids are finally on Christmas break (Winter break as they call it at school, which REALLY annoys me!) and I am so happy to finally get to sleep in a few days!  I don't even remember the last time I have gotten to sleep in, so this is going to be amazing.  I even broke out my "Happy Christmas" sentiment, despite the fact that I am not a fan of that phrase either!  At least they left the Christmas in that one though!  I used some happy colors for The Friday Mashup and clean&simple challenges.  The mashup challenge is to use heat embossing on a clean and simple layout, which is why I chose this one from clean&simple:
I always love the sketches they have on their site because of the simplicity!  This one took me just a few scraps of designer paper, some rhinestones and my embossed image.

I wanted my ornament to be multi-colored so I inked it up with VersaMark and then sprinkled Melon Mambo Embossing Powder over it lightly and then filled in the spaces with Wild Wasabi Embossing Powder.  I love the result!  It was a little too "clean" for me, so I got out my Color Spritzer to add a little bit of color to the background.

Stamp Sets: More Merry Messages, Ornament Keepsakes
Cardstock: Whisper White, Wild Wasabi
Ink: VersaMark, Melon Mambo, Wild Wasabi
Tools: Holiday Ornaments Framelits, Finishing Touches Edgelit, Heat Tool, Color Spritzer
Accessories: Melon Mambo and Wild Wasabi Embossing Powder, Brights and Subtles DSP stacks, Basic Rhinestones, Dimensionals

Thursday, December 20, 2012

Sparkly Star

I just had to combine the challenges at CASology and SUO Challenges together today!  Stars and glitter!
You can't have a star without a little bit of glitter now, can you?
I don't think I have any star punches, dies or stamps except for this one north star!  Which I absolutely love and won't be using much anymore after this week so I thought why not? :)  This is the best technique ever for this stamp set, and I think the only one I have used with it so far!  Stamp the image and sentiment on the cardstock, sponge the edges with ink, cover the image with an adhesive sheet, and pour Dazzling Details over the entire thing.  It is SOOOO stunning in real life. The front panel is on Dimensionals to make it pop out even more.

Stamp Sets: Come to Bethlehem, More Merry Messages
Cardstock: Always Artichoke, Certainly Celery
Ink: Always Artichoke
Tools: Lacy Brocade Embossing Folder, Sponge
Accessories: Dazzling Diamonds, Whisper White Organza Ribbon

Christmas Countdown-5 Days

I just saw some new challenges posted this morning and decided to play along!  The challenge at The Paper Players is all about snowflakes and the sketch at Pals Paper Arts worked perfectly with my snowflake die!
I decided to go more in the direction of winter than Christmas, so I have some cards ready for January's Card Camp!  Winter is my probably my favorite time of year to design cards for, because it is a perfect chance to add glitter to every project. :)  Of course, then I am forever walking around with it all over my face, on my clothes and in my hair. I love it when I see a sparkle on Brett's face. I'll be like "Woot, woot!  Check out Mr. Glitter!"  He loves it too, I'm sure. ;)
The back panels are embossed with the Northern Flurry Embossing Folder and then I covered them with the 2-Way Glue Pen and poured Dazzling Details over the top.  For the largest snowflake, I die cut it and then stamped it in Pool Party with the Hello, Doily background stamp to add some texture to it.  The small snowflake is also covered in Dazzling Details and then I added the Vintage Faceted Button with Crystal Effects to finish it off.  Here is a close-up shot of some of the details.
 
Stamp Sets: Blessings from Heaven, Hello, Doily
Cardstock: Pool Party, Whisper White
Ink: Pool Party
Tools: Northern Flurry Embossing Folder, Snow Flurry Bigz Die
Accessories: Dazzling Diamonds, Vintage Faceted Button, 2-Way Glue Pen, Adhesive Sheets, Crystal Effects


Wednesday, December 19, 2012

Christmas Countdown-6 days

I don't know about your kids, but my kids are SOOOO excited for Christmas.  It's getting more fun for us too, the older they get.  This year their Santa gifts are actually things they asked for so we cannot wait to see the looks on their faces!  Most of the stuff from us is "boring" stuff, like clothes (which I LOVE to get! lol), so I hope they REALLY enjoy their Santa gifts! :)

Fab Friday has another fabulous color combination that I think is just perfect for a Christmas card and I paired it with a great sketch from Try Stampin' On Tuesday.

I sure have been getting a lot of use out of my In Colors lately!  Every one of them looks fantastic on a Christmas card, in my opinion.  I sure will miss Pool Party when it retires this summer...or will it?  Maybe they will decide to find a place for it in the Subtles collection.  I wouldn't mind replacing one of the light blues in there with it. :)
My favorite part of this card is all of the texture. I am OBSESSED with embossing folders. I honestly don't know how I lived without them!  I am working on a card for the Creative Crew over on Splitcoaststampers using ONLY stamps, ink and paper and it is TOUGH!  I am spoiled by all of these cool tools and accessories we have now!  The Jumbo Eyelet is retired but I couldn't help but keep some on hand for my tags.  I don't know why in the world these ever retired. :(  I don't keep many things once they retire, but this is one of my must-haves for tags!
 
Stamp Set: More Merry Messages
Cardstock: Gumball Green, Pool Party, Primrose Petals, Real Red, Whisper White
Ink: Gumball Green
Tools: Circle Punch, Holiday Ornament Framelits, Square Lattice, Perfect Polka Dots and Chevron Embossing Folders, Crop-a-dile (oops, another retiree!), Square Punch
Accessories: Jumbo Eyelet (retired), Primrose Petals Stitched Satin Ribbon, Dimensionals


Black and Gold Birthday

We are celebrating my uncle's 50th birthday on Friday and the colors from Dynamic Duos seemed to coordinate perfectly with the sketch at Freshly Made Sketches for a birthday card for him! 
Unfortunately, this is one of those color combinations that just does not photograph well!  Which is too bad because it looks pretty cool in person! lol
The cardstock that looks Crumb Cake is actually Gold and has a very nice shimmer to it. I embossed the medallion with Gold Embossing Powder to give it even more glisten.  The sentiment is embossed with Black Embossing Powder. I wanted to add in the music, but the only thing I had was some of the Naturals Composition Specialty DSP, which is kind of a Crumb Cake color.  I brayered it with Basic Black ink, then pulled it off with a tissue to get the music notes to show through. I wanted even more bling, so I sponged some VersaMark on the outside edges of the card, poured Gold Embossing Powder over it, and pulled off some of it with a paintbrush to create a kind of sun ray effect. 
 
Stamp Set: Bring on the Cake
Cardstock: Basic Black, Gold Shimmer
Ink: Basic Black, VersaMark
Tools: Bigz Alphabet Typeset, brayer, Chevron Embossing Folder, Heat Tool
Accessories: Black and Gold Embossing Powder, Natural Composition Specialty DSP, Dimensionals


Tuesday, December 18, 2012

Christmas Countdown

I can't believe it is just one week until Christmas!  Here I have been complaining about making Christmas cards, and I only have one week left to make them before it arrives.  I think I will continue to make them all year, just so I can stock up for next year. It has been so nice having all these cards to send out, instead of rushing at the last minute to make a bunch of the same card.  Everyone gets an original!  Today I used this great color combination from Play Date Cafe and sketch from Try Stampin' On Tuesday:

The sketch worked perfectly with three colors for the back panels!  I used Gumball Green, Primrose Petals and Raspberry Ripple to match the colors given in the challenge.
Lacy Brocade has to be my favorite embossing folder ever. I just think it is so elegant!  I started with a large piece of Gumball Green cardstock and adhered the other colors to it, then trimmed it to fit my card and embossed it. This way I was able to get it all embossed as one piece instead of trying to line up the pieces after I embossed them. That would have been a nightmare and I know I would have been annoyed if they didn't line up. :)
 
Stamp Sets: More Merry Messages, Scentsational Season
Cardstock: Gumball Green, Primrose Petals, Raspberry Ripple, Whisper White
Ink: Chocolate Chip, Gumball Green, Primrose Petals, Raspberry Ripple
Tools: Lacy Brocade Embossing Folder, Holiday Collection Framelits, Apothecary Accents Framelits, Hole Punch
Accessories: Silver Glimmer Paper, Primrose Petals Stitched Satin Ribbon, Dimensionals
Monday, December 17, 2012

CAS Butterflies

I am glad that Christmas is approaching quickly, because I am a little tired of making Christmas cards! I am sure that once it is over though, I will regret ever saying that. :)  Today I decided to bring some Spring into my day with a butterfly card. The color combo at Color Throwdown and sketch at CAS(E) this Sketch! were perfect for it!

I know that sketch looks like it would be perfect for ornaments, and I will probably have to try that some day soon too!  I decided to turn the sketch sideways so my butterflies looked like they were flying, not falling. lol


I started by poking the butterfly trails with my Paper Piercer and Paper-Piercing Mat. I just free handed them. My customers hate when I do this.  They want a pattern for everything! lol  The smaller butterflies are from the Beautiful Wings Embosslit and the big butterfly is Papillon Potpourri and the coordinating Elegant Butterfly Punch.  I can't wait to get my hands on the new little butterfly punch that will be in the Spring Catalog!  Once I had my butterflies down and sentiment stamped, it really bothered me that the right-hand side of the card was so empty, so I added the scored bored.  It feels like it balances it out a little better now. :)
 
Stamp Sets: God's Blessings, Papillon Potpourri
Cardstock: Bashful Blue, Basic Black, Daffodil Delight, Pacific Point, Whisper White
Ink: Pacific Point
Tools: Elegant Butterfly Punch, Beautiful Wings Embosslit, Paper-Piercing Tool and Mat, Simply Scored
Accessories: Basic Rhinestones

Simply Thanks

For today's card I used the them from Hand Stamped Sentiments and the sketch from Freshly Made Sketches.
I know the kids will have lots of thank you notes to send out after Christmas, so I wanted to do something that would be simple for them to help recreate multiple times.
For the background, I inked the Woodgrain Embossing Folder with Lucky Limeade ink before embossing the cardstock, just to add a little bit of variation to it.  The sentiment is embossed with Early Espresso Embossing Powder on Festival of Prints DSP.  I had a lot of little scraps leftover from some Christmas tags I made, so this was a great way to use them up.  The gingerbread man's hat is made from the Pennant Builder Punch and scraps of Very Vanilla cardstock that I tore and added Dazzling Details to.
 
Stamp Set: Just Believe, Scentsational Season
Cardstock: Lucky Limeade, Very Vanilla
Ink: Chocolate Chip, Lucky Limeade, VersaMark
Tools: Woodgrain Embossing Folder, Holiday Collection Framelits, Pennant Builder Punch, heat tool
Accessories: Clear and Red Dazzling Details, Dimensionals, Early Espresso Embossing Powder


Sunday, December 16, 2012

Downline & Hostess Christmas Party Cards

Today I wanted to share with you one of the projects we worked on at my Downline & Hostess Christmas Party!  It was kind of a game, actually.  What I did was put a card base and some scraps of Designer Series Paper in an envelope for each guest.  Everyone had the same materials and I put a few stamp sets, ink pads, Framelits and embossing folders out for them to use. I told them they would have 30 minutes to make a card.  After 10 minutes, I told them to return to their seats, gather up all of their card pieces and pass it to the person on their right to finish.  After another 10 minutes, I told them to pass it to the right again.  We had so much fun with this!  It was so neat to see what everyone came up with, and how different the cards turned out from what the original designer had planned!  In the end, the original designer got her card back.  I can't remember who worked on which card, but they were made by Aimee, Lisa, Mandy, Linda and Steph. :)  I think they turned out really good!


This card was made by 8-year-old Kelly who came with her mom.  She was working so nicely on her card, I didn't make her trade. :)